
Your Cart is Empty


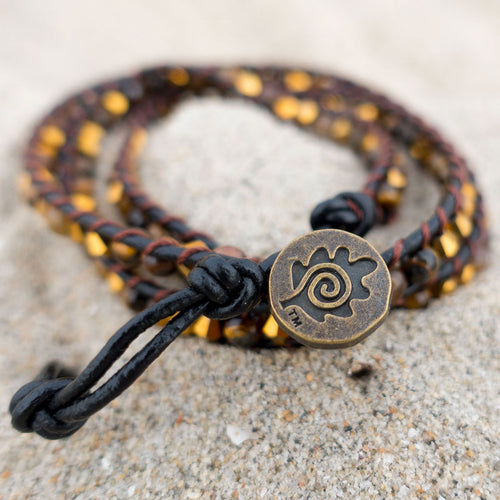

Happy Summer! Now that everyone is out of school and enjoying some summer fun, we’re focusing on some fun and patriotic projects for the upcoming July 4th holiday - but you can wear them year-round of course! Today, we share a fun twist on our Shambala Bracelet Kits. Make a small one for your littlest Yankee Doodle Sweetheart, or a large and a small for a matching mommy and me or big sister/little sister set.

Supplies:
3-5 Shambala Rhinestone Crystal Beads (10mm)
2 Shambala Rhinestone Crystal Beads (8mm)
3-5 Shambala Rhinestone Ruby Beads (10mm)
Scissors (for trimming cord)
Beading Needle (for stringing beads)
Candle, lighter or nail polish (for sealing the ends of the cord)
Shambala Kit instructions

Step 1: Cut a piece of your Shambala Blue cord that is 18” (45 cm) long. Tie an overhand knot near the end, and thread an 8mm bead onto the cord. At this point you will want to use a clipboard or or somehow fasten your working piece (at the end with the knot) to a hard surface. You will want some resistance because you will be tying knots on your working piece.
TIP: If you have any trouble stringing the beads, you may want to try a beading needle.
Step 2: Cut a second piece of cord that is 48” (120 cm) long. Fold the cord in half, and place the halfway point under the cord attached to your hard surface, leaving approximately 4” (10 cm) between the bottom of the bead and where the halfway point hits the cord. (See Step 2 diagram).
Step 3: Following the Square Knot Diagram in the instructions, and using the doubled length of cord, tie a total of 8 square knots (6 for smaller wrists) around the center cord.
Step 4: Now you will begin stringing your 10mm beads. If you wish to alternate colors, string your first color onto the center cord, moving it up to just below your last square knot snugly.
Step 5: Bring the doubled cord around the outer edges of the bead and tie 2 more square knots. Repeat this process as many times as you wish, alternating between Crystal and Ruby beads. We suggest 5 beads or fewer for smaller wrists, more for larger wrists are ok!
Step 6: After you have placed your final bead, tie 8 (or 6) square knots to finish this section of the bracelet.
Step 7: Trim the cords you used for the square knots to ⅛”, and seal the ends using a candle, lighter or nail polish. Be sure to keep the center cord intact and away from the flame!

Step 8: Now you will be overlapping each end of the center cord, and creating a knotted section which will allow the bracelet to expand and contract to fit over your hand and onto your wrist. Line up the two pieces of the center cord so they are facing opposite directions and overlapping (See Step 8 Diagram).
Step 9: Cut a 36” (90 cm) length of cord. You will now fold this cord in half and place the halfway point under the overlapping cords (See Step 9 Diagram). You will use this new cord to tie square knots around the center cord pieces. See Step 9 directions to determine the number of knots required for the length bracelet you desire.
Step 10: Once you have finished tying your square knots, trim the cords you used for the square knots to ⅛”, and seal the ends using a candle, lighter or nail polish. Be sure to keep the center cords intact and away from the flame!
Step 11: Slide the knotwork along the cords to center the bracelet. Finally, string your final 8mm bead onto the unadorned end of the cord and secure it with a final knot. Trim the cord end to a short length (match the other end of the bracelet) and seal both ends as previously instructed.
Step 12: Enjoy wearing your new bracelet, or give it to your favorite little sweetheart(s)!
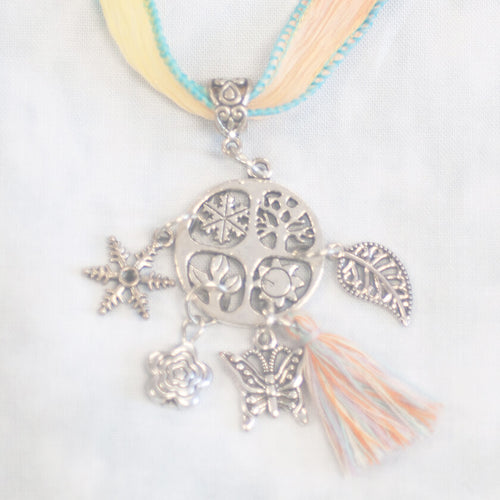
On our next blog post, we’ll share a full tutorial for our new Estrella Layered Necklace! This stylish layered necklace uses our new Estrella linked crystal gems, and you can make yours using 3 colors or the same color of gems - below is a sneak peek at our patriotic version of this project.

We’d love to see what you create! Tag us in your photos using the hashtag #solidoakinc and follow us on Instagram @solidoakinc to see more of our crafty projects and products.
Like this post? Pin it!
